说在前面
元素拖拽和缩放现在也是一个很常见的功能,让我们从实现div元素的拖拽缩放开始来了解元素拖拽缩放的具体原理和实现方法吧。
效果展示
 AI改图-Document - Google Chrome 2023-09-26 22-50-31-720x382.gif
 AI改图-Document - Google Chrome 2023-09-26 22-55-50-720x382.gif
实现步骤
画一个div
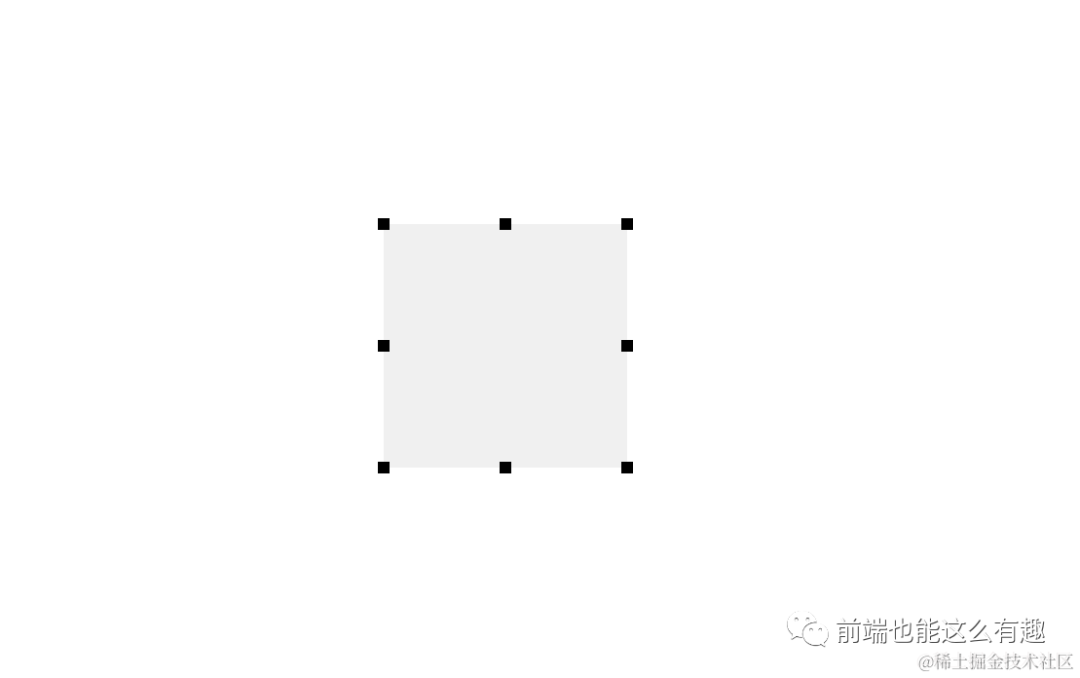
首先我们需要先画一个div,并给它8个方位(上、下、左、右、左上、右上、右下、左下)加上缩放锚点,我们可以通过这几个锚点来对div进行缩放,具体代码如下:
<!DOCTYPE html>
<html lang="en">
  <head>
    <meta charset="UTF-8" />
    <meta http-equiv="X-UA-Compatible" content="IE=edge" />
    <meta name="viewport" content="width=device-width, initial-scale=1.0" />
    <title>Document</title>
    <link rel="stylesheet" href="./index.css" />
  </head>
  <body>
    <div class="box" id="drag">
      <div class="resize-handle top-left"></div>
      <div class="resize-handle top"></div>
      <div class="resize-handle top-right"></div>
      <div class="resize-handle right"></div>
      <div class="resize-handle bottom-right"></div>
      <div class="resize-handle bottom"></div>
      <div class="resize-handle bottom-left"></div>
      <div class="resize-handle left"></div>
    </div>
  </body>
  <script src="./index.js"></script>
</html>
加点css
将锚点定位到其特定的位置上,并设置不同的鼠标指示效果,具体代码如下:
.box {
  position: absolute;
  left: 50%;
  top: 50%;
  transform: translate(-50%, -50%);
  width: 200px;
  height: 200px;
  background-color: #f0f0f0;
  cursor: move;
}

.resize-handle {
  position: absolute;
  width: 10px;
  height: 10px;
  background-color: #000;
}

.top-left {
  top: -5px;
  left: -5px;
  cursor: nw-resize;
}

.top {
  top: -5px;
  left: calc(50% - 5px);
  cursor: ns-resize;
}

.top-right {
  top: -5px;
  right: -5px;
  cursor: ne-resize;
}

.right {
  top: calc(50% - 5px);
  right: -5px;
  cursor: ew-resize;
}

.bottom-right {
  bottom: -5px;
  right: -5px;
  cursor: se-resize;
}

.bottom {
  bottom: -5px;
  left: calc(50% - 5px);
  cursor: ns-resize;
}

.bottom-left {
  bottom: -5px;
  left: -5px;
  cursor: sw-resize;
}

.left {
  top: calc(50% - 5px);
  left: -5px;
  cursor: ew-resize;
}
效果是这样的:
 image.png
完成拖拽和缩放功能
拖拽功能
我们需要鼠标在div内按下不松开的时候,div可以跟着鼠标的位置移动,这里我们可以从鼠标的三种事件的触发来入手:
首先我们需要监听鼠标按下事件。
const dragElement = document.getElementById("drag");
dragElement.addEventListener("mousedown", startDrag);
判断点击事件是否为锚点触发,是的话则不执行拖拽逻辑。这里我们可以通过样式名来判断,锚点我们都给它加上了resize-handle,我们只需要判断样式名是否包含resize-handle就可以。
function startDrag(event) {
  event.preventDefault();
  const currentHandle = event.target;
  const isResizeHandle = currentHandle.className.includes("resize-handle");
  if (isResizeHandle) return;
}
记录下鼠标点击的坐标及拖拽元素所在位置,用于后面计算鼠标移动距离和对拖拽元素进行移动,监听鼠标移动和抬起事件
  const startX = event.clientX;
  const startY = event.clientY;
  const startLeft = dragElement.offsetLeft;
  const startTop = dragElement.offsetTop;
  document.addEventListener("mousemove", drag);
  document.addEventListener("mouseup", stopDrag);
鼠标移动的时候计算鼠标当前位置与鼠标点击位置的相对距离,将拖拽元素的位置也移动相应的相对距离
function drag(event) {
  const dx = event.clientX - startX;
  const dy = event.clientY - startY;
  const newLeft = startLeft + dx;
  const newTop = startTop + dy;
  dragElement.style.left = newLeft + "px";
  dragElement.style.top = newTop + "px";
}
鼠标抬起的时候将鼠标移动和鼠标抬起的监听事件移除。
function stopDrag() {
  document.removeEventListener("mousemove", drag);
  document.removeEventListener("mouseup", stopDrag);
}
到这里我们就完成了一个最基本的可拖拽元素了,接下来就该来实现缩放功能了。
缩放功能
我们希望在点击缩放锚点进行移动的时候,元素会随着鼠标继续缩小或放大,这里我们仍然是要从鼠标触发的三种事件来入手:
我们需要监听所有锚点的鼠标按下事件,首先我们需要先获取所有的锚点元素:
const resizeHandles = document.getElementsByClassName("resize-handle");
再监听所有锚点元素的鼠标按下事件:
Array.from(resizeHandles).forEach((handle) => {
  handle.addEventListener("mousedown", startResize);
});
记录鼠标按下的初始位置及缩放元素的初始位置和宽高,便于后面对缩放元素进行缩放操作,并为缩放元素加上鼠标移动和鼠标抬起的监听事件。
function startResize(event) {
  event.preventDefault();
  const currentHandle = event.target;
  const direction = currentHandle.className.split(" ")[1];
  startX = event.clientX;
  startY = event.clientY;
  startWidth = dragElement.offsetWidth;
  startHeight = dragElement.offsetHeight;
  startLeft = dragElement.offsetLeft;
  startTop = dragElement.offsetTop;
  document.addEventListener("mousemove", resize);
  document.addEventListener("mouseup", stopResize);
  }
鼠标移动的时候我们需要判断当前是从哪个锚点触发的缩放事件,我们可以从锚点的样式名className来做区分。
const currentHandle = event.target;
const direction = currentHandle.className.split(" ")[1];
不同锚点我们需要对元素进行不同的操作,我们可以分为四个方位来进行判断并区分操作:
(1)左边
判断样式名是否包含left,左边锚点会触发元素的宽度变化及左右位置的变化,这时候鼠标左移相对于元素来说是放大,右移相对于元素来说是缩小,所以元素的宽度应该减去鼠标的位移距离。
if (direction.includes("left")) {
  width = startWidth - dx + "px";
  left = startLeft + dx / 2 + "px";
}
(2)右边
判断样式名是否包含right,右边锚点会触发元素的宽度变化及左右位置的变化,这时候鼠标左移相对于元素来说是缩小,右移相对于元素来说是放大,所以元素的宽度应该加上鼠标的位移距离。
if (direction.includes("right")) {
  width = startWidth + dx + "px";
  left = startLeft + dx / 2 + "px";
}
(3)上边
判断样式名是否包含top,上边锚点会触发元素的高度变化及上下位置的变化,这时候鼠标上移相对于元素来说是放大,下移相对于元素来说是缩小,所以元素的高度应该减去鼠标的位移距离。
if (direction.includes("top")) {
  height = startHeight - dy + "px";
  top = startTop + dy / 2 + "px";
}
(4)下边
判断样式名是否包含bottom,下边锚点会触发元素的高度变化及上下位置的变化,这时候鼠标上移相对于元素来说是缩小,下移相对于元素来说是放大,所以元素的高度应该加上鼠标的位移距离。
if (direction.includes("bottom")) {
  height = startHeight + dy + "px";
  top = startTop + dy / 2 + "px";
}
我们还需要判断当前元素的宽度和高度是否小于等于0,等于0的时候我们不再对其进行缩放操作,大于0则对元素进行赋值操作。
if (parseInt(width) <= 0 || parseInt(height) <= 0) return;
dragElement.style.width = width;
dragElement.style.height = height;
dragElement.style.left = left;
dragElement.style.top = top;
完整代码如下:
function resize(event) {
    const dx = event.clientX - startX;
    const dy = event.clientY - startY;
    let width = startWidth,
      height = startHeight,
      left = startLeft,
      top = startTop;
    if (direction.includes("left")) {
      width = startWidth - dx + "px";
      left = startLeft + dx / 2 + "px";
    }
    if (direction.includes("right")) {
      width = startWidth + dx + "px";
      left = startLeft + dx / 2 + "px";
    }
    if (direction.includes("top")) {
      height = startHeight - dy + "px";
      top = startTop + dy / 2 + "px";
    }
    if (direction.includes("bottom")) {
      height = startHeight + dy + "px";
      top = startTop + dy / 2 + "px";
    }
    if (parseInt(width) <= 0 || parseInt(height) <= 0) return;
    dragElement.style.width = width;
    dragElement.style.height = height;
    dragElement.style.left = left;
    dragElement.style.top = top;
}
鼠标抬起的时候将鼠标移动和鼠标抬起的监听事件移除。
function stopResize() {
    document.removeEventListener("mousemove", resize);
    document.removeEventListener("mouseup", stopResize);
}
到这里我们就完成了一个最基本的可拖拽缩放的元素了。
完整代码
完整的JavaScrip代码如下:
const dragElement = document.getElementById("drag");
// 拖拽功能
dragElement.addEventListener("mousedown", startDrag);
function startDrag(event) {
  event.preventDefault();
  const currentHandle = event.target;
  const isResizeHandle = currentHandle.className.includes("resize-handle");
  if (isResizeHandle) return;
  const startX = event.clientX;
  const startY = event.clientY;
  const startLeft = dragElement.offsetLeft;
  const startTop = dragElement.offsetTop;
  document.addEventListener("mousemove", drag);
  document.addEventListener("mouseup", stopDrag);
  function drag(event) {
    const dx = event.clientX - startX;
    const dy = event.clientY - startY;
    const newLeft = startLeft + dx;
    const newTop = startTop + dy;
    dragElement.style.left = newLeft + "px";
    dragElement.style.top = newTop + "px";
  }
  function stopDrag() {
    document.removeEventListener("mousemove", drag);
    document.removeEventListener("mouseup", stopDrag);
  }
}
// 缩放功能
const resizeHandles = document.getElementsByClassName("resize-handle");
Array.from(resizeHandles).forEach((handle) => {
  handle.addEventListener("mousedown", startResize);
});

function startResize(event) {
  event.preventDefault();
  const currentHandle = event.target;
  const direction = currentHandle.className.split(" ")[1];
  const startX = event.clientX;
  const startY = event.clientY;
  const startWidth = dragElement.offsetWidth;
  const startHeight = dragElement.offsetHeight;
  const startLeft = dragElement.offsetLeft;
  const startTop = dragElement.offsetTop;
  document.addEventListener("mousemove", resize);
  document.addEventListener("mouseup", stopResize);
  function resize(event) {
    const dx = event.clientX - startX;
    const dy = event.clientY - startY;
    let width = startWidth,
      height = startHeight,
      left = startLeft,
      top = startTop;
    if (direction.includes("left")) {
      width = startWidth - dx + "px";
      left = startLeft + dx / 2 + "px";
    }
    if (direction.includes("right")) {
      width = startWidth + dx + "px";
      left = startLeft + dx / 2 + "px";
    }
    if (direction.includes("top")) {
      height = startHeight - dy + "px";
      top = startTop + dy / 2 + "px";
    }
    if (direction.includes("bottom")) {
      height = startHeight + dy + "px";
      top = startTop + dy / 2 + "px";
    }
    if (parseInt(width) <= 0 || parseInt(height) <= 0) return;
    dragElement.style.width = width;
    dragElement.style.height = height;
    dragElement.style.left = left;
    dragElement.style.top = top;
  }
  function stopResize() {
    document.removeEventListener("mousemove", resize);
    document.removeEventListener("mouseup", stopResize);
  }
}
该文章在 2023/11/1 9:47:47 编辑过